

Creating a "Vectorisation" effect with Java2D
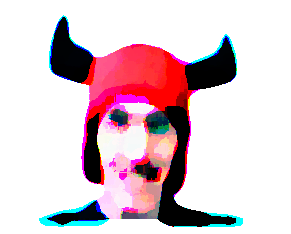
On my about me page I have a picture of myself wearing a stupid hat and an even more stupid grin. This picture started out as an old photograph from which I removed the background using GIMP, then vectorized using an online tool called Vector Magic.
Vector Magic is a very cool tool - it converts bitmap's to vector images by "tracing" the bitmap. Once vectorised you can rescale the image as large as you like without losing the smooth edges.
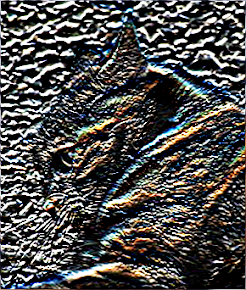
Here are the two images of me - on the left is the bitmap (before vectorisation) and on the right is a bitmap of the vectorized image created by Vector Magic (I vectorised the image for the comic-book effect of vectorisation, not in order to use the vector image itself):
 |
 |
Hopefully you can see the effect I'm talking about - large areas of colour are blocked out, and generally you get a kind of comic-book or oil-painting effect.
After vectorizing that image I started wondering how it worked and if I could whip up something myself, and so I began playing with Java2D to see if I could get close.
"Hatching" the image
I began my efforts with a very simple approach of testing pixels in each row and "dragging" a pixel colour across adjacent pixels until I encounter a pixel with a significantly different colour, at which point I swap the current colour and repeat the process.
Thanks to Java2D doing all the heavy lifting, the code is pretty short:
public void hatch() {
    // load the image and extract the raster data
    BufferedImage _img = loadImage("cat.jpg");
    Raster _raster = _img.getData();

    // prepare a new raster to write the hatched
    // version of the image to
    BufferedImage _copy = new BufferedImage(
        _img.getWidth(), _img.getHeight(), _img.getType());
    WritableRaster _writable = _copy.getRaster();

    double[] _current = new double[3];
    double[] _previous = new double[3];
    double[] _write = new double[3];

    int _threshold = 75;

    for (int y=0; y<_img.getHeight(); y++) {
        for (int x=0; x<_img.getWidth(); x++) {
            // for each pixel in the image, decide whether
            // to use its original colour, or to drag in the
            // colour of a preceding pixel
            _current = _raster.getPixel(x, y, _current);
            _write = decide(_previous, _current, _threshold);
            _writable.setPixel(x, y, _write);
            _previous = Arrays.copyOf(_write, _write.length);
        }
    }

    // save the result to a new png file
    ImageIO.write(_copy, "png", new File("cross-hatch.png"));
}

private double[] decide(double[] aThis, double[] aThat, int aThreshold) {
    for (int i=0; i<aThis.length; i++) {
        if (Math.abs(aThis[i] - aThat[i]) > aThreshold) {
            return aThat;
        }
    }
    return aThis;
}
This has an interesting arty effect of "hatching" the image, but before the vectorisation effect becomes significant I start to get colour runs, where the colour gets dragged too far.
I played around with combining vertical and horizontal (and even diagonal) hatching with lower thresholds, which again produces a nice arty effect - particularly on hi-res images, but it isn't really the effect i'm looking for.
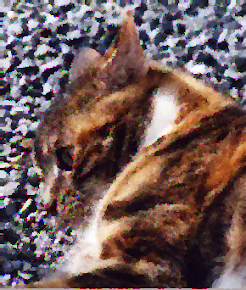
Below are some (lo-res) examples, using a high threshold value to make the effect more pronounced.
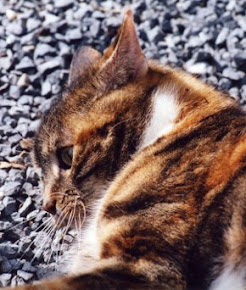 original image |
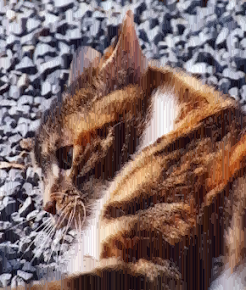 vertical hatching |
|---|---|
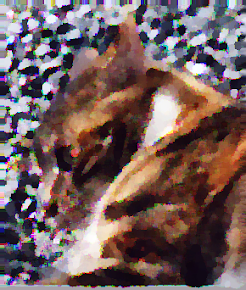
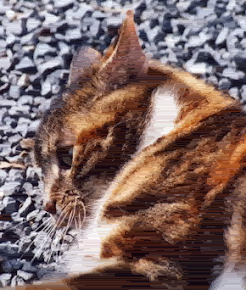 horizontal hatching |
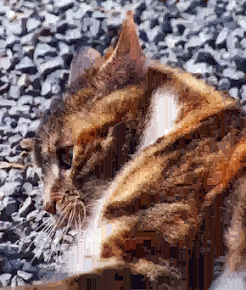 cross hatching |
If you look carefully at certain areas of the images you can see the colour runs - for example on the dark area just where the cats leg joins its body at bottom right of the image, you can see the lighter brown vertical lines in the vertical-hatching image, and similar horizontal lines in the horizontal hatching image.
Notice that the cross-hatching image is starting to get the blocky effect somewhat similar to vectorisation, but pushing the thresholds high enough to create significant blocks of colour ruins the overall effect by dragging too much colour across the image.
I tried various techniques to reduce the drag effect - including an inverse-square factor of the distance since the colour was first encountered. This did indeed smooth things quite a bit, but still doesn't achieve the effect i'm looking for. Time for a new approach.
Edge Detection
Next I pondered some obvious techniques like edge detection. The classic mechanism for edge detection is to apply a filter, or convolution kernel, where each pixel is treated with respect to several surrounding pixels. Simple edge detection kernels look something like this:
Horizontal
|
Vertical
|
|---|
Here's what running the "horizontal" edge-detection kernel on the cat image produces:
Edge Detected
|
|---|
And the code for that, again made very simple by Java2D's built in convolution support:
public void edgeDetect() throws Exception {
    BufferedImage _input = loadImage("cat.jpg");
    BufferedImage _horiz = convolve(_input, newHorizontalKernel());
    ImageIO.write(_horiz, "png", new File("edge.png"));
}

private BufferedImage convolve(BufferedImage anImage, Kernel aKernel) {
    BufferedImage _out = new BufferedImage(
        anImage.getWidth(), anImage.getHeight(), anImage.getType());

    ConvolveOp _op = new ConvolveOp(aKernel, ConvolveOp.EDGE_NO_OP, null);
    _op.filter(anImage, _out);

    return _out;
}

private Kernel newHorizontalKernel() {
    return new Kernel(3, 3, new float[] {
        -2, -4, -2,
        0, 0, 0,
        2, 4, 2
    });
}

private Kernel newVerticalKernel() {
    return new Kernel(3, 3, new float[] {
        -2, 0, 2,
        -4, 0, 4,
        -2, 0, 2
    });
}
This is a neat result, and probably I could use the edges thus detected as indicators of where to switch colours, but this just seems like a very round-about way of producing what i want. Time for a new approach.
Convolution with a dynamic kernel
After scratching my head for a while I figured that what I really want to do is somewhere between the two approaches outlined above. I want to use a weighted function of the surrounding pixels (like a convolution kernel), but I want to do something a bit more complex than I can achieve with a static convolution kernel.
After quite a bit more monkeying around I finally nailed it. This time I'm examining pixels around the current one, finding the most common value for each colour channel, and giving the current pixel the most common value for each colour channel. Strictly speaking this isn't a convolution operation at all, but the analogy is a useful one.
I get some slightly funky alias effects on some images, so my next task is to smooth that out, but overall the results are very close to what I was after.
Here's the code:
public void vectorEffect()
throws Exception
{
    BufferedImage _img = loadImage("cat.jpg");
    Raster _raster = _img.getData();

    BufferedImage _copy = new BufferedImage(
        _img.getWidth(), _img.getHeight(), _img.getType());
    WritableRaster _writable = _copy.getRaster();

    int _blockWidth = 8;
    int _blockHeight = 8;

    int _halfWidth = _blockWidth / 2;
    int _halfHeight = _blockWidth / 2;

    int[] _lens = new int[(_blockWidth * _blockHeight) * 3];

    for (int y=0; y<_img.getHeight(); y++) {
        for (int x=0; x<_img.getWidth(); x++) {
            // get the surround NxM pixel grid as a
            // one dimensional array of r,g,b values
            _lens = _raster.getPixels(
                Math.max(0, x-_halfWidth),
                Math.max(0, y-_halfHeight),
                Math.min(_img.getWidth()-x, _blockWidth),
                Math.min(_img.getHeight()-y, _blockHeight),
                _lens
            );
            _writable.setPixel(x, y, getPixelColour(_lens));
        }
    }

    ImageIO.write(_copy, "png", new File("vector-effect.png"));
}

// choose the colour for the current pixel by finding the most
// common value for each colour channel in the surrounding pixels
private int[] getPixelColour(int[] aSurrounding) {
    int[] _result = new int[3];
    _result[0] = mostFrequent(0, aSurrounding);
    _result[1] = mostFrequent(1, aSurrounding);
    _result[2] = mostFrequent(2, aSurrounding);
    return _result;
}

// find the most frequent colour level for a given channel
// within the surrounding pixels. offset of 0 gives red channel,
// 1 gives green channel, 2 is blue channel
private int mostFrequent(int anOffset, int[] aSurrounding) {
    Counter _c = new Counter();
    int _length = aSurrounding.length-(2-anOffset);
    for (int i=anOffset; i<_length; i+=3) {
        _c.add(aSurrounding[i]);
    }
    return _c.mostFrequent();
}

// relatively efficient counter for quickly racking up
// a count of occurrences of any given colour level
class Counter {
    int[] values = new int[256];

    public Counter() {
        Arrays.fill(values, -1);
    }

    public void add(int aValue) {
        values[aValue] += 1;
    }

    public int mostFrequent() {
        int _highest = -1;
        int _colour = -1;
        for (int i=0; i<256; i++) {
            if (values[i] > _highest) {
                _highest = values[i];
                _colour = i;
            }
        }
        return _colour;
    }
}
And here's what the resulting "vector-effect" image looks like:
4x4 sample grid
|
8x8 sample grid
|
|---|
Because of the low resolution of this image, a large grid size quickly reduces the resultant image quality. On larger images (e.g. 8MP photos) a 16x16 or even 32x32 grid produces good results. The time to render is proportional to the grid size though.
Me Again
Here's the results of processing my viking-hat picture with four different grid sizes: 2x2, 4x4, 8x8 and 16x16. You can see that at such a low resolution the image quickly degenerates with a large grid size - I'm looking pretty demonic by the time we get to 16x16:
 2x2 |
 4x4 |
|---|---|
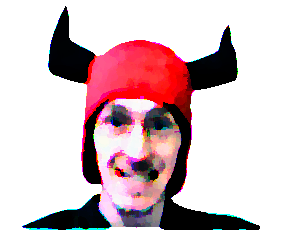 8x8 |
 16x16 |
A High-Resolution Image
An 8MP image (3456x2304) processed with a 16x16 grid takes about 50 seconds on my quad-core i7 laptop. The same image processed with an 8x8 grid takes 27 seconds.
This last image was processed at its full size (3456x2304) with a 16x16 grid, then the result was cropped and resized (by more than 50%) in GIMP to fit the width of my blog.
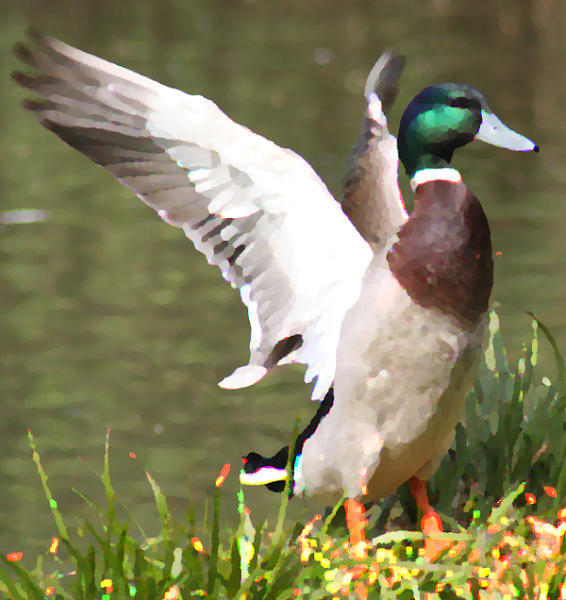
vector effect, using a 16x16 grid
|
|---|
What's next?
Well its still some way off from the clean look that Vector Magic produces, but I think its a good start. I'm going to try some ideas to de-fuzz and clean up the edges a bit.
After that ... I'm wondering if I can take the next step and identify bounds for the areas of colour, and thus create a vector image from my "vector-effect" bitmaps?
blog comments powered by Disqus