Perforated postage-stamp border with Inkscape
This short tutorial explains how I created a curved-serrated border - such as you would find on a tear-off postage stamp - using the Inkscape vector graphics tool (v0.48.2). It is extremely easy to do, and shouldn't take more than 5 minutes.
Getting Inkscape
If you're running a debian based linux you can install Inkscape with:
sudo apt-get install inkscape
Ubuntu users can install it using the graphical Ubuntu software centre. Downloads for other OS's can be found here.
Creating the perforated border
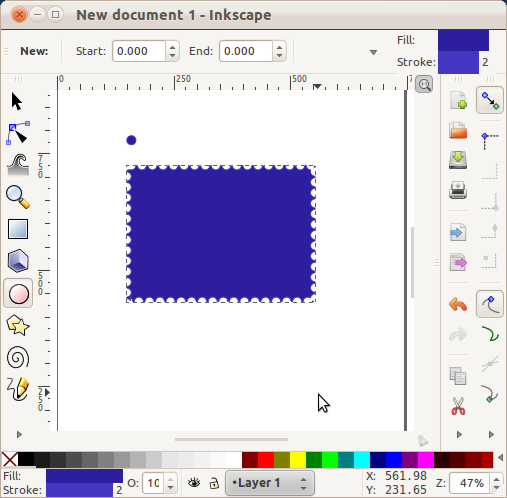
First draw a rectangle using the "rectangles and squares (F4)" tool. Make this reasonably large.
Then select the "circles, ellipses and arcs (F5)" tool and draw a much smaller circle. Holding down the ctrl key while drawing the circle will lock the aspect ratio so that you don't end up with an ellipse.
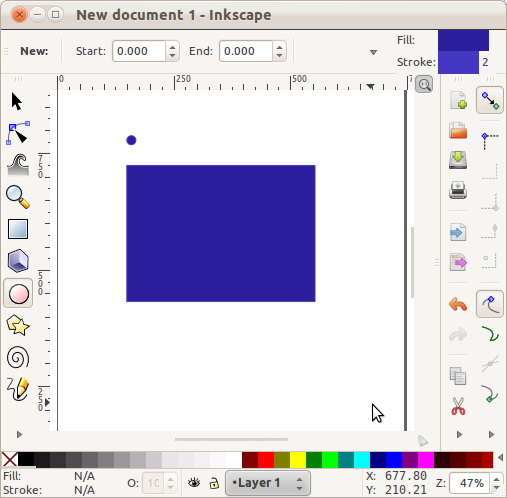
Next, select both the circle and the rectangle by first selecting the circle then holding down the shift key and selecting the rectangle.
Now from the "Extensions" menu, select "Generate from path" and in the sub-menu, select "Pattern along path". The "Pattern along Path" dialog pops up.
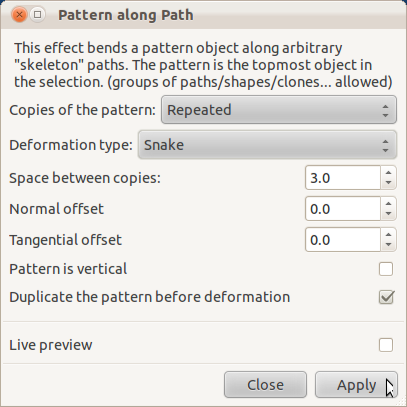
Choose "Repeated" in the "Copies of the pattern" combo, in "Deformation type" choose "Snake", and pick a number for "Space between copies" - this is the distance between each circle that will be cut out from the border of the rectangle, so good values depend on the size of your circle and subjective taste. Hit "apply".
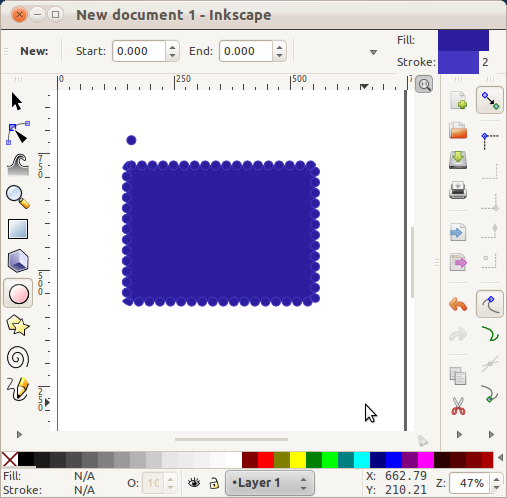
Now we want to remove the path created by the circles around the border of the rectangle. To do that, first select the circles around the edge of the rectangle, then (holding down shift) select the rectangle itself and then choose "Difference" from the "Path" menu.
Change the colour of your postage-stamp shape to black (fill and stroke), then select it and hit ctrl-c to copy it, then ctrl-v to paste a new copy. Re-select the original and choose "Filters->Blurs->Evanescent" - this creates a nice blurred shadow effect.
Select the new copy and change it to an off-white colour (I went for #fbfad4ff), then move it so that it sits just a few pixels above and to the left of the original (blurred shadow) shape.

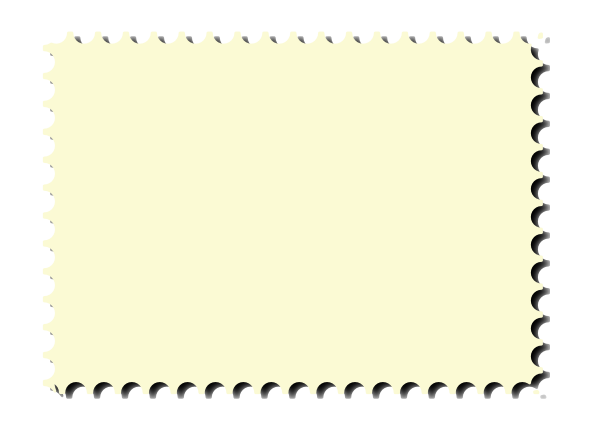
That's it, all done! Now you can add whatever content you like to your stamp and then export as a bitmap image. Below you can see what mine looks like exported as a png. Notice that the corners aren't quite "right" - this is because I didn't spend any time trying to ensure that the rectangle side-lengths were appropriately divisible by the circle + the space between copies - something that's worth doing if you want to get your stamp to look "just right".